How to Install Metallic Epoxy Floor: A Pro's Step-by-Step Guide
How to Install Metallic Epoxy Floor: A Pro's Step-by-Step Guide

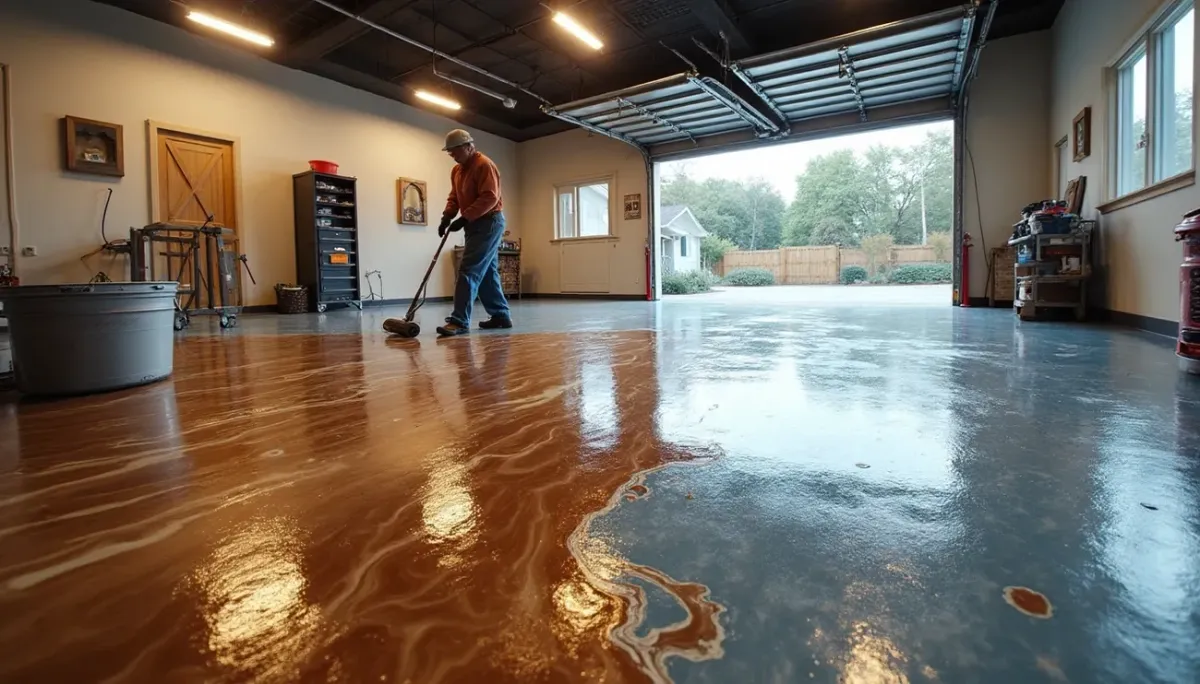
Metallic epoxy floors transform ordinary concrete into spectacular, three-dimensional surfaces that captivate with their depth and shimmer. Unlike standard epoxy, these striking installations create a marbled, fluid appearance that mimics the look of molten metal or swirling galaxies.
However, achieving these stunning results requires precise technique and proper materials. While epoxy flooring has been popular in commercial settings for decades, the metallic variant has recently surged in residential applications - from living rooms to basements and garages. Essentially, it offers the perfect combination of durability and visual impact.
In this comprehensive guide, we'll walk through each critical step of installing a metallic epoxy floor. Specifically, you'll learn how to prepare your surface properly, mix and apply the materials effectively, and create those eye-catching metallic effects that make this flooring option so desirable. Whether you're a DIY enthusiast or a professional contractor looking to expand your skills, this step-by-step process will help you achieve professional-quality results.
Understanding Metallic Epoxy Flooring
Metallic epoxy represents a remarkable advancement in floor coating technology, combining artistic flair with industrial-grade performance. Beyond just a protective layer, these specialized coatings create captivating spaces that stand out from conventional flooring options.
What makes metallic epoxy different
The distinctive quality of metallic epoxy flooring lies in its composition and visual impact. This innovative coating combines clear epoxy resin with specialized metallic pigments that create extraordinary depth and dimension. During application, these light-reflective particles settle and move within the resin, producing swirling patterns reminiscent of natural stone, lava flows, or cosmic landscapes [1].
Unlike standard epoxy which provides a solid, uniform color, metallic epoxy generates a three-dimensional appearance through various application techniques. Installers manipulate the material using air movement, specialized rollers, and solvent interactions to craft unique designs [2]. Consequently, each installation becomes one-of-a-kind, as the metallic particles create dynamic effects that cannot be precisely replicated.
The finished surface exhibits a pearlescent quality with remarkable depth. When light strikes the floor, it reflects off the metallic pigments at different angles, creating an illusion of movement and fluidity. This characteristic makes metallic epoxy particularly suitable for spaces where visual impact matters as much as durability.
Where metallic epoxy is commonly used
Metallic epoxy flooring has found applications across diverse environments due to its balance of esthetics and functionality:
Residential spaces:
Living rooms and basements seeking a contemporary look
Kitchens and entryways requiring easy maintenance
Garages needing chemical and stain resistance
Commercial environments:
Retail showrooms and car dealerships leveraging the reflective qualities
Restaurant dining areas and commercial kitchens benefiting from hygiene properties
Hotel lobbies and corporate offices making strong first impressions
Art galleries and museums complementing displayed works [2]
Educational institutions particularly favor metallic epoxy for its durability under heavy foot traffic and minimal maintenance requirements. Schools and universities benefit from its seamless surface that allows easy cleaning of dust and mud [3].
Many business owners choose metallic epoxy for high-traffic areas like office lobbies, as it maintains its elegant appearance despite constant use. Additionally, industrial settings such as garages appreciate its resistance to chemicals, smudges, and heavy loads [3].
Benefits over traditional epoxy
Metallic epoxy delivers several advantages beyond standard epoxy formulations:
First, these floors exhibit exceptional durability, with properly installed surfaces lasting up to 20 years with light to moderate use [4]. The addition of metallic pigments actually enhances abrasion resistance compared to regular epoxy [5].
Furthermore, the seamless, non-porous surface prevents dirt, bacteria, and moisture from penetrating, making cleaning remarkably straightforward. A simple sweep and occasional mop are typically sufficient for maintenance [6].
Another significant benefit is the remarkable customization potential. With virtually endless color combinations and pattern possibilities, metallic epoxy can be tailored to match any design esthetic or brand image. The finish can range from high-gloss to matte, depending on specific requirements [2].
Additionally, metallic epoxy offers environmental advantages. Many formulations contain minimal volatile organic compounds (VOCs), making them a safer, odor-free option for indoor spaces [6].
Perhaps most importantly, despite its luxurious appearance, metallic epoxy provides practical benefits including stain resistance, scratch resistance, and the ability to incorporate anti-slip additives for enhanced safety in wet areas [6].
Tools and Materials You’ll Need
Successful installation of a metallic epoxy floor requires proper preparation and having the right equipment on hand. Before beginning your project, gather all necessary tools and materials to ensure a smooth application process from start to finish.
Protective gear and safety equipment
Safety comes first when working with epoxy products. Most epoxy components contain chemicals that require proper protection:
Respirator mask with organic vapor cartridges to prevent inhalation of fumes
Chemical-resistant gloves (nitrile or neoprene) to protect skin from irritation
Safety goggles to shield eyes from splashes
Protective clothing including long sleeves and pants
Spike shoes or cleats for walking on wet epoxy without leaving footprints
Ventilation equipment such as fans to maintain air circulation
Remember that proper ventilation is absolutely essential when working with epoxy products, especially in enclosed spaces. Open windows and use fans to direct fumes outdoors.
Mixing tools and containers
Precise mixing is critical for achieving proper chemical reactions in epoxy systems. Your toolkit should include:
For measuring: Digital scale with gram precision for accurate pigment ratios and calibrated measuring containers for consistent proportions between base and hardener.
For mixing: Variable-speed drill with a mixing paddle attachment (rectangular paddles work better than circular ones). Have at least two mixing buckets - one for initial mixing and another for secondary blending of colors and additives.
Importantly, select buckets that are at least 2-3 times larger than your batch size to prevent spillover during vigorous mixing. Clean, non-reactive plastic containers work best, while metal containers should be avoided as they might affect curing.
Rollers, squeegees, and brushes
Application tools determine the smoothness and finish quality of your metallic epoxy floor:
For primer and topcoat application, use 3/8-inch nap rollers with extension poles for comfortable application without bending. For edges and corners where rollers can't reach, keep trim brushes and small foam rollers handy.
The base coat requires specialized tools: notched squeegees help control thickness and coverage rate, while spike rollers remove trapped air bubbles that could otherwise form imperfections. Additionally, keep microfiber rollers available for the final passes to ensure a smooth, streak-free surface.
Primer, base coat, metallic pigments
Quality materials directly impact the durability and appearance of your finished floor:
Start with a moisture-resistant epoxy primer compatible with your concrete substrate. For the base coat, select a 100% solids epoxy as it provides maximum durability without shrinkage during curing.
The star components - metallic pigments - come in powder or liquid form and are available in numerous colors. Purchase these from reputable suppliers to ensure consistent particle size and maximum light-reflecting properties.
For concrete with visible imperfections, consider adding self-leveling additives to your base coat mix to help create a perfectly smooth foundation.
Top coat and optional additives
The final layer protects your investment and determines the floor's finish characteristics:
Choose a clear polyaspartic or polyurethane topcoat for maximum UV resistance and chemical protection. These formulations prevent yellowing and provide superior scratch resistance compared to standard epoxy topcoats.
Optional additives worth considering include:
Anti-slip agents such as fine silica particles that can be broadcast into the still-wet topcoat for additional traction in potentially wet areas.
Accelerators or retarders to adjust working time based on your climate conditions and project size.
Flake additives that can complement metallic effects by adding subtle texture or dimension to specific areas of the floor.
Prior to purchasing materials, calculate square footage accurately and add 10-15% extra to account for waste, spillage, and possible touch-ups.
Surface Preparation Essentials
Proper surface preparation serves as the foundation for a successful metallic epoxy floor installation. Indeed, nine out of ten coating failures can be traced back to inadequate preparation steps. The concrete must be thoroughly prepared to create optimal bonding conditions for the epoxy system.
Cleaning and degreasing the floor
Initially, remove all furniture and belongings from the area. Then sweep thoroughly to eliminate loose dirt and debris. For a metallic epoxy floor to adhere properly, the concrete surface must be completely free of contaminants:
Apply a concrete degreaser to remove oil spots, grease stains, and chemical residues that would otherwise prevent proper bonding
Scrub the surface with a stiff-bristled brush, paying special attention to heavily soiled areas
Rinse thoroughly with clean water to remove all cleaning agents and residue
For stubborn stains, specialized concrete cleaners may be necessary. After cleaning, allow the surface to dry completely, as moisture can interfere with the epoxy adhesion.
Repairing cracks and imperfections
Identifying and fixing surface defects is crucial before applying metallic epoxy. Unrepaired cracks or holes can lead to serious issues:
Fill visible cracks with an epoxy concrete patch compound or resin-based patcher paste. Use a trowel to work the material into the cracks, ensuring it's level with the surrounding floor. Allow the compound to cure fully according to manufacturer recommendations - typically 24 hours or longer for complete hardening.
Afterwards, sand the repaired areas smooth to create a consistent surface. This step is vital since any unevenness will show through the final metallic epoxy coating.
Creating the right surface profile
The concrete surface must have the proper texture for epoxy to bond effectively. Smooth concrete won't allow proper adhesion, therefore creating a rough profile is essential.
Mechanical grinding is the most reliable method for achieving the ideal surface profile. Using a floor grinder with diamond grinding tooling removes the top layer of concrete, creating a porous surface with excellent bonding capabilities. This approach simultaneously removes existing coatings and creates the optimal texture.
Alternatively, acid etching creates a rough profile by chemically reacting with the concrete. However, this method has limitations - it won't work on painted or heavily stained areas and requires neutralization afterward.
The goal is achieving a surface texture similar to 80-grit sandpaper, which provides maximum adhesion for your metallic epoxy floor system.
Step-by-Step Installation Process
With your surface properly prepared, you're now ready to begin the actual installation process of your metallic epoxy floor. This multi-step procedure requires patience and attention to detail for professional results.
1. Apply the primer coat
First, prepare the primer according to manufacturer instructions. For best results, avoid using acetone for surface cleaning; instead, use 91% isopropyl alcohol for preparation and between layers. Apply the primer using a squeegee followed by back-rolling with a 3/8-inch nap roller to fill voids and create an even surface. This crucial step seals the concrete, preventing air bubbles from forming in subsequent layers. Allow the primer to cure completely—typically 6-24 hours depending on temperature and humidity.
2. Mix and pour the base coat
Once the primer has cured, mix your base coat epoxy. Most metallic systems use a 100% solids epoxy with a 2:1 ratio (two parts resin to one part hardener). Mix thoroughly for 2-4 minutes using a drill with paddle attachment or mixing stick. For smaller batches (less than 3/4 gallon), manual mixing is preferable to avoid introducing air bubbles.
Pour the mixed epoxy onto the floor in long ribbons across the surface. Notably, don't let mixed material sit in the bucket longer than 5 minutes as it may begin to gel. Use a notched squeegee (1/8" or 3/16") to spread the material evenly at approximately 3-6 ounces per square foot.
3. Add and swirl metallic pigments
For metallic effects, divide the mixed epoxy into multiple containers and add metallic pigments to each—one main base color (largest portion) and two accent colors (smaller portions). Pour accent colors onto the base in the desired pattern. To create dynamic effects:
Pour colors in opposite directions—never simply pour one color directly on top of another
Use a squeegee trowel with light pressure to spread and blend colors
Consider "dipping and shaking" techniques with brushes for exotic looks
Apply solvents like denatured alcohol or isopropyl alcohol to create crater effects
4. Remove air bubbles and level the surface
Shortly after application, spray 91% isopropyl alcohol across the surface to eliminate air bubbles. This step is vital for a flawless finish. For larger projects, use a spiked roller to further release trapped air. The floor will continue self-leveling for several hours—avoid overworking the surface as this can blend colors excessively and diminish the distinct metallic effect.
5. Apply the top coat for protection
After allowing the metallic layer to cure for 24 hours, apply a clear protective topcoat—polyaspartic or polyurethane are recommended for UV protection and durability. Mix according to manufacturer instructions and apply with a 3/8" nap microfiber roller in a thin, even layer using a cross-hatch pattern (front-to-back, then side-to-side). For slip resistance, consider adding a non-skid additive to the topcoat. Allow 24-48 hours before permitting foot traffic on the finished floor.
Curing, Maintenance, and Longevity
Following installation, patience becomes your greatest ally with metallic epoxy floors. The stunning visual effects you've created need proper time to set and harden before facing the demands of daily life.
How long to wait before use
The curing process for metallic epoxy flooring happens in stages. Generally, floors become dry to touch within 24 hours [7], but this doesn't mean they're ready for full use. Most experts recommend waiting at least 72 hours before walking on your new floor [8]. For full chemical cure and heavy traffic, allow 7 days [9].
Temperature significantly influences curing times - ideal application temperature ranges from 55-90°F [9]. Moreover, humidity levels above 85% can affect proper bonding [9]. For optimal results, maintain consistent temperature throughout the curing process.
Cleaning tips for long-term shine
Maintaining the dramatic appearance of metallic epoxy requires minimal yet consistent care. To preserve your floor's lustrous finish:
Sweep or dust regularly to prevent scratches from debris [10]
Mop every few weeks with warm water and mild soap [10]
Clean spills immediately, as neglected stains may damage the coating [11]
Avoid using citrus cleaners or vinegar as these will diminish the glossy appearance [12]. Instead, opt for pH-neutral cleaners or simple solutions like diluted ammonia (half cup to a gallon of hot water) [12].
When to recoat or refresh the floor
Properly installed metallic epoxy floors can last between 10-20 years [13]. Nevertheless, the clear topcoat may require refreshing every 3-5 years, depending on traffic levels [14]. Watch for these signs indicating recoating is needed:
Yellowing or cloudy appearance [10]
Visible wear in high-traffic areas
Surface scratches or minor damage
For recoating, light sanding with 120-grit sandpaper creates proper adhesion for the new layer [15]. If the existing coating shows peeling or delamination, this indicates deeper issues requiring professional assessment rather than simple recoating [15].
With appropriate maintenance, your metallic epoxy floor will maintain its dramatic visual impact while providing excellent durability for many years.
Conclusion
Metallic epoxy flooring stands as one of the most impressive transformations you can make to concrete surfaces. Throughout this guide, we've explored every critical step needed to achieve those eye-catching, three-dimensional effects that make these floors so desirable. Proper preparation undoubtedly serves as the foundation for success, while careful application techniques create the distinctive swirling patterns that set metallic epoxy apart from standard options.
Your newly installed metallic epoxy floor offers remarkable benefits beyond its striking appearance. The durability of these surfaces withstands heavy traffic for years, while their seamless, non-porous nature makes cleaning remarkably straightforward. Additionally, the customization potential allows you to create truly unique spaces tailored to your specific esthetic vision.
Remember that patience plays a crucial role during the curing process. Allowing sufficient time for each layer to set properly ensures the longevity and performance of your investment. Subsequently, simple maintenance practices like regular sweeping and occasional mopping will preserve the floor's dramatic visual impact for many years.
Whether you've undertaken this project for a residential space or commercial environment, metallic epoxy flooring delivers an exceptional combination of artistic flair and practical performance. The results speak for themselves – a stunning, professional-quality surface that transforms ordinary concrete into an extraordinary focal point. Your metallic epoxy floor will certainly continue to impress and perform well into the future with minimal care and attention.
References
[1] - https://elegantcoatings.ca/metallic-epoxy-flooring-art-and-science/
[2] - https://cccepoxy.com/metallic-epoxy-floor-coating-stunning-designs-for-modern-spaces/
[3] - https://duphill.com/blog/5-best-uses-of-metallic-epoxy-flooring/
[4] - https://www.stonhard.com/blog/what-are-metallic-epoxy-floors/
[5] - https://concretegrindingauckland.net.nz/how-does-metallic-epoxy-differ-from-regular-epoxy-in-appearance/
[6] - https://ultracoatingepoxyflooring.ca/metallic-epoxy-floors/
[7] - https://leggari.com/blog/epoxy-flooring-dry-time/
[8] - https://xtremepolishingsystems.com/blogs/decorative-concrete-and-epoxy-blog/epoxy-curing-why-how-and-how-long
[9] - https://epoxycolorado.com/blog/epoxy-flooring/what-is-the-curing-time-for-epoxy-flooring/
[10] - https://utahconcretecoating.com/how-to-clean-and-maintain-metallic-epoxy-floors/
[11] - https://globalgarageflooring.com/metallic-garage-flooring-maintenance-how-to-keep-your-surface-in-top-condition/
[12] - https://xtremepolishingsystems.com/blogs/decorative-concrete-and-epoxy-blog/epoxy-floor-care-effective-procedures-for-routine-cleaning-and-maintenance?srsltid=AfmBOopEFVC7QHSyX36fwULu-OavOLp-eekJTxo6XvcBaaX31_i_qsdg
[13] - https://www.swiftepoxyflooring.ca/epoxy-floors-lifespan/
[14] - https://www.carpetgallery.ca/blog/articles/how-to-extend-the-lifespan-of-your-epoxy-floor-the-ultimate-maintenance-guide
[15] - https://allgaragefloors.com/prep-older-epoxy-for-new-coat/
